Pages

Thursday, May 22, 2014

THE SECRET IS OUT! (5 must-have photo editing apps!)

I've been meaning to write this post for a long time, but to be honest, I've been stingy- because I didn't want to give up my Instagram-Photo-Editing Secrets!
But, enough of you asked for them- so I figured, what the heck? Let's do this!
Here are the 5 different apps I use to edit photos for Instagram (or just for other uses) at any given time:
must-have photo editing apps!
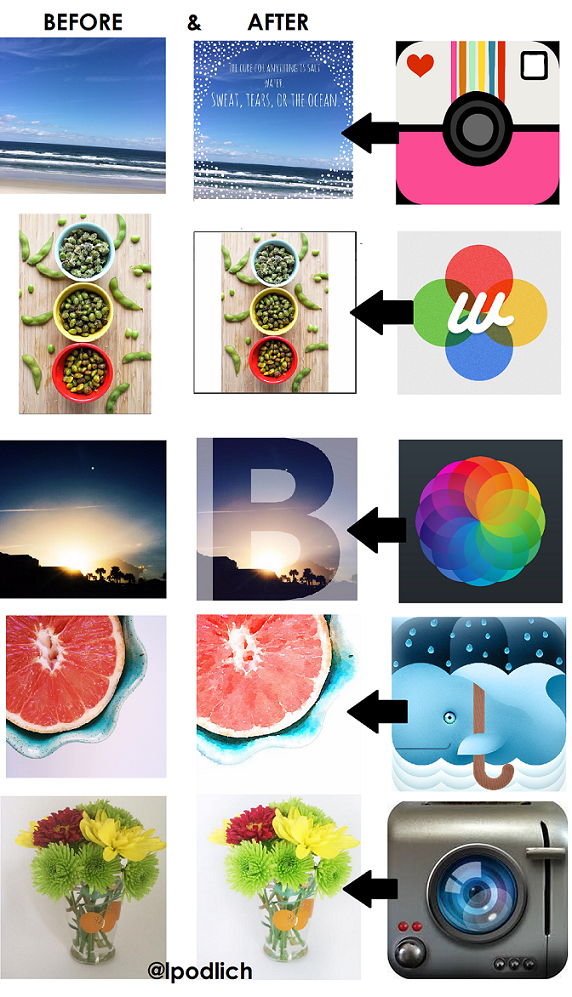
A Beautiful Mess App: Anytime I want to add cutesy text, borders, or other fun overlays on my photos! There are a few limited filters on this app too- but none that I totally love. It's really best for adding quotes, words, names, or drawings in a range of colors to your favorite photos!

Whitagram: You know when you see someone's Instagram feed that is all rectangles with white borders- rather than the usual Instagram square? They're probably using Whitagram. This free app allows you to keep the true scale of your image, but size down for Instagram use- sometimes you just can't crop your pictures into a square, they're just too perfect the way they are!

AfterLight App: MMMMMkay. Instagram filters ain't got nothin' on this app. It has a bajillion different filters, as well as overlays, vignettes, etc. My favorite part is that you can either change the overlay/borders to a different color other than white- or fade it, so you can still see some of the original image behind it (see the "B" image below)

Waterlogue: Looking to make your photos into art in one quick button press? Then Waterlogue is the app for you- making all images look like they're painted brushstrokes- this app makes all images print-worthy. Hint- High contrast images work best here!

PhotoToaster:  This app is legit better than the photo editing software that came with my computer. It's not about frilly filters and words- it's just there to make your pictures be enhanced, and the best they can be. It takes a few times using it to really master it, but once you do, you can adjust saturation, white balance, tint, exposure, and so much more. It's my #1 go-to!
must-have photo editing apps!

So there you have it- My 5 go-to photo editing apps!

I'd love to know- what are your favorites? Any of these that you use as well?
Be sure to find me on Instagram (@lpodlich) for more photos & tips!

xo, lp


Share the photo editing LOVE! Pin to share these tips with your friends & followers!
must-have photo editing apps!
*please, no reposting any images! thank you!


**For all you online shoppers, don't forget to use EBATES! find out more HERE ** 

Tuesday, May 20, 2014

BEST BITES: PETITE STRAWBERRY SCONES

It's strawberry season, my friends- which means you can expect a whole lot of strawberry recipes coming your way in the near future, starting out with these delightful little strawberry scones!
If you're not a scone lover, these may just convert you- they're soft, buttery, and just the right amount of sweet. 
If you're a fan of more tangy fruit taste- there's also an optional lemon glaze to throw on these babies once they're cooled!

What you'll need to make it happen (makes 12 small scones):
For the scones:
-2 cups flour
- 6 tablespoons butter, cubed and softened
- 2/3 cup heavy cream
- 2 teaspoons baking powder
-4 tablespoons granulated sugar
- 1 1/3 cups diced strawberries
- 1 teaspoon lemon juice

For the Optional Glaze:
- Juice of 1/2 large lemon
-Zest of 1 large lemon
- 1/3 cup powdered sugar
 (pssst, you can get these perfect bowls HERE!)

How to make it happen:
First- let me say this- it's messy, but the best way to mix up the dough is with your hands. It just is. So wash them THOROUGHLY, and get down to business!
Step 1: Stir your strawberries in a bowl with 1 tsp lemon juice and 1/2 tablespoon sugar- set aside.
Step 2: Mix your flour, baking powder, and 3 tablespoons of sugar together in a large bowl, then knead in your softened butter cubes (with your hands!) until butter is well mixed, and you have a crumbly-textured mixture.
Step 3: Add in your berries and your heavy cream, and mix gently together until well mixed, but not overly mashed- you want to keep your strawberries in tact!
Step 4: Dusting flour on your hands, split the dough into two circles, and pat out into small domes about 2 inches thick.
Step 5: Using a knife dusted in flour- cut your circles into 6 pieces each, and transfer to a parchment lined baking sheet, and top with sugar.
Step 6: Bake at 400 for 20 minutes, checking at 12/16 minutes to see how they're coming along They're done when they're a VERY pale golden brown!
Step 7: Allow to cool and top with glaze if so desired (glaze: just mix the 3 ingredients listed until a runny, liquid icing consistency).
Enjoy!

The finished product!!

 Like I said, these scones are soft- not at all tough or dry like those scones with bad reputations have ! ;-)
They'd be PERFECT for a summer tea party, breakfast get together, or a picnic dessert!

If strawberry scones aren't your thing, or you are just a mad-scone-lover, try my Blueberry Lemon Drop Scones, Cinnamon Brown Sugar Oat Scones, or Orange Cranberry Scones!


What's your favorite strawberry recipe?
If you try these out, be sure to take a picture and share it on Instagram- tag me @lpodlich so I can see your awesome work!

xo, lp


----


for more B&B, find me on instagram here!


Monday, May 19, 2014

MICE, RAIN, AND OTHER CAMPING ADVENTURES.

Oh this weekend was too lovely.

Michael and I decided that this weekend was as good as any for the first camping trip of the season- and boy, did it turn out to be perfect. Like any true camping trip- it had it's fair share of surprises- like scaring some mice out of the outhouses during a late night bathroom stop- or a random rain shower during a walk when weather.com had said 0% chance all nice long....but that's what makes for good stories, right?
-------

We drove to Governor Dodge State Park in Dodgeville, WI, and after setting up camp we took a beautiful hike. My favorite part? This lovely waterfall off one of the main trails:

Since it's early in the season, the park wasn't packed at all, and other than some crappy dog owners & their barking dogs, it was pretty quiet. We snuck away to one of the lakes at the park to get some time to relax on the docks- and watched a seriously perfect sunset:

Because one state park wasn't enough for us, we ran over to Blue Mounds to get a quick look at how Spring was fairing in Wisconsin. We took the shot we take every time we visit the park- M looking over the land from one of the watch towers- sure was a lot sunnier than the last few times!:

 Alright, enough Wisconsin camping talk.
Let's talk about tomorrow's recipe....rather than giving you the "after" pictures, see if you can guess what I'll be sharing tomorrow based on the ingredients! I mean, it has strawberries and butter so...you know it can't be bad, right?

Mmmk.
That's all for now, friends. Oh, except for if anyone wants to buy me a black or mint 'L' one of these, that'd be great. THANKS.

Anyone else enjoy the great spring weather this weekend?
Let me know what I missed while I was on my camping hiatus!

xo, lp


for more snaps, find me on instagram here!


Wednesday, May 14, 2014

Blogger Buzz, v.10

And since April showers bring May flowers, the crew thought it might be fun to share their favorite blooms.

2. Lauren Felix of La Petite Fashionista // When I first moved to Wisconsin, I was so spoiled because I had Peonies growing right outside my house! I was always sticking them in mason jars.

3. Meghan Anderson of Downtown Daydreams // It depends on the season, but Peonies always catch my eye! I love how dainty they are, and adore the plethora of beautiful colors you can find them blooming in.

4. Laura Podlich of Beauty & the Beard //  Orange Lilies remind me of my mother's gardens at the house I grew up in!

5. Katherine Nolden of The Duchess of Plumewood // Gerber Daisies lift my mood every time I see them—so bright and fun!

6.Ashley Fine of One Fine Day // Whenever I have white-colored Hydrangeas in the house, I suddenly feel as though I live in a Nancy Meyers flick (Something's Gotta Give, anyone?), or I could mingle with Ina Garten in The Hamptons.


What's your bloom of choice? Do tell.


xo, lp

Tuesday, May 13, 2014

THE MOST ADDICTING (healthy) SNACK: FLAVORED ROASTED EDAMAME THREE WAYS

*psst! thanks for stopping by B&B! 
for more recipe ideas or colorful images, find me on instagram--> @lpodlich!*

--------------


Let's talk edamame:
It's a great source of protein, fiber, and a bunch of other good stuff...and it's delicious!
If you're already an edamame lover, I'm hoping you'll dig one of these 3 recipes...and if you're not an edamame lover, I hope one of these will convert you!
On today's post I've got parmesan garlic, cracked pepper and sea salt, and a smoky & spicy mix!
-------

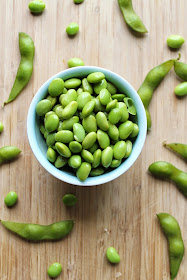
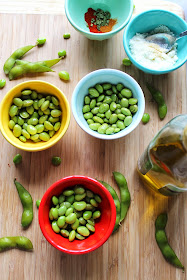
I'm not going to tease you here with some "before" pictures, I'm jumping RIGHT into the "after" pictures of this edamame:
healthy snack: roasted edamame recipes to make at home

Looks good, right?

First things first, you'll need some edamame. I buy mine organic and in bulk frozen in the pods. I cook them in boiling water and then just pop them out of the pods. I'ts a super fast process!
healthy snack: roasted edamame recipes to make at home

 What you'll need to make them happen:

Parm & Garlic: 
 1/4 cup edamame /// 1/4 teaspoon garlic powder /// 1 tablespoon powdered parmesan cheese /// 1 teaspoon olive oil

Pepper & Sea Salt:
 1/4 cup edamame /// 1/4  teaspoon black pepper /// 1/2 teaspoon sea salt  /// 1 teaspoon olive oil

Smoky & Spicy:
 1/4 cup edamame /// 1/4 teaspoon cayenne pepper /// 1/4 teaspoon paprika /// 1 teaspoon olive oil

**add 1/2 teaspoon dried chives to any of these if you're feeling like you need some more green in there:)
healthy snack: roasted edamame recipes to make at home

How to make it happen:
Step 1: Mix each of the above combos in individual bowls (hard, right?)
Step 2: Spread out on a tinfoil lined baking sheet
Step 3: Roast in a 350 degree oven for 20 minutes, or until crispy
healthy snack: roasted edamame recipes to make at home

 And now, for their close ups (pin your favorite!):
parmesan roasted edamame!

healthy snack: roasted edamame recipes to make at home

healthy snack: roasted edamame recipes to make at home

 With the directions being this easy, you have no reason NOT to try these!

Have a favorite flavor combination you think I should try?
Let me know folks- I'd love to try new flavors for another recipe...and give you full credit, obviously ;-)


xo, lp


for more food recipes go HERE

for more B&B, find me on instagram: @lpodlich


Monday, May 12, 2014

YOU LOOK GOOD!!

Happy Monday, you lovely people!

First things first- if you didn't see it on Instagram last week- just a friendly reminder in case you haven't told yourself this lately:
 Now that we all know you look good, let's talk about what's been good around here lately:

The other weekend I was back at a favorite antique store in MN and found some fabulous old juice glasses...and naturally put flowers in them because flowers > juice.
 In a continuation of the "everything in rainbow order" fad, I organized my small bowls from Anthropologie. (you can find them here)

My parents were in town this weekend, which was SUCH a treat, I've never had my mom in Madison for Mother's Day before! We got plenty of together time at the Farmer's Market, dinner at Papavero, walks around the Capitol, and even some garage sale-ing. Thanks for the perfect weather this weekend, Wisconsin!
Oh....and this is Michael with my mom&dad. I asked them to pose nicely for a picture and they turned around. RUDE.

Tomorrow's recipe involved edamame, so you know it's going to be good:


I'll keep it short and sweet this week-

How was your weekend, friends?
Anyone do any fun surprises for their moms, or have any surprises from their children?

xo, lp


for more compulsive rainbow ordering, find me on instagram here:


Thursday, May 8, 2014

INCREDIBLE INSTAX

 First, this post is NOT sponsored. So just don't get any ideas, mmmmkay?

Second, If you already have a Fujifilm Instax, allow me to give you a high five, and dismiss you from this post, since you already get what it's all about.

Let's begin:

Raise your hand if you grew up with a Polaroid.
I did, and since you all already know how I feel about printed pictures vs digital, I'm sure you can imagine how much I loved that thing.
Polaroids disappeared and now we have point & shoots, which are great and all...but they allow you to never be satisfied with a picture...and take another and another and another.
The great thing about Polaroids was you got the instant satisfaction of having your printed right away...but you still have the mystery of not knowing what it's going to look like! 

That's why I freaking love my Instax camera. 
Michael's sister gave it to me for Christmas and it is by far one of my most beloved & used gifts (thanks Kelly!).
Instax cameras aren't cheap. They aren't $20 bucks or anything, but they are worth their weight in gold...which I mean... gold is worth a lot so.....there's that.

The pictures show up with a vintage-y glow, and I've get to take one that didn't surprise me when it turned out. I'm kind of addicted.
Love the white one I have...but they have 'em in pink and yellow and blue and black
I have these hung up around our apartment and I love the memories that are attached to them!

Have I convinced you yet?

So no waiting
Go treat yo'self, order an Instax and some film & show me the fabulous pictures you take!

xo, lp


(ps. i'm a nerd and label when & where i took them. yup)

sometimes I can't contain myself and share them on instagram. pictures of pictures. #creative!
find me here:

Tuesday, May 6, 2014

BEST BITES: SRIRACHA ROASTED CAULIFLOWER

I've been posting a lot of sweets & boozy recipes on the blog here lately, so I figured it was time for a healthy bite!
This recipe just calls for a couple ingredients, and if you don't like roasted veggies now, after this post- you juuuuust might. I mean, there's sriracha in it, so you know it's legit.

What you'll need to make it happen:
- 3 cups cauliflower, cut bit sized
- 2 tablespoons olive oil
- 1 tsp sriracha (feel free to double/triple that amount if need be)
- sea salt
- lime *optional

How to make it happen:
Step 1: Preheat your oven to 350
Step 2: Whisk together your olive oil & sriracha, and mix in your cauliflower until well coated
Step 3: Sprinkle with sea salt & spread out on a foil lined baking sheet.
Step 4: Roast for 30 minutes, rotating to keep one size from over-browning midway through
Step 5: Turn on the broil for 2-3 minutes until top is browned, serve and enjoy!
*optional: squeeze some lime juice over the top for a tangy kick!


If you're a spice lover, feel free to load up with as much sriracha as need be :)

What's your favorite way to roast veggies?
Send your great recipes my way, I'd love to try them!


xo, lp

**for more food recipes, go here!
**to find me on instagram, go here!


Monday, May 5, 2014

RADIO SILENCE & ORGANIZED CHAOS

Oh heyyyyy.
Remember me? 
I know, a little over a week away from me and you're having anxiety- don't worry I'm back! ;-)

It's been a little hectic around here (hence the radio silence), but I figured it was time to get into the swing of things again!

Here's what's good lately:

I know it looks messy, but this is actually organized in my book when it comes to my jewelry. Spring cleaning at it's finest... 

Spring is fully here which means hydrangeas in allll the stores! I couldn't resist grabbing an armful of them. Bought all that was left in the store! Tip to refreshing hydrangeas that wilt a little? Cut the stems and put them in boiling water. In 30-45 minutes they should perk right up!

With the crazy weeks as of late, this card was completely necessary:

This weekend we went to MN to see a friend's band play...and I was crazy enough to think it might be warm enough to wear this Anthro dress (spoiler alert, it wasn't):

Tomorrow's recipe comes from last night's dinner....Sriracha roasted cauliflower. So. Good.

Anyone else been doing some spring cleaning?
Or flower hoarding? 

xo, lp


For Instagram fun, find me here!