Showing posts with label PIN-A-WEEK. Show all posts

Thursday, January 19, 2012

4 seasons mugs

Mug Madness, take 2:

I saw these 4 seasons mugs on Pinterest a while back and completely loved them. I guess I'm on a mug making kick after the MPLS city skyline mugs from a while back. I checked out the Etsy shop they came from, planning on purchasing them if they were the right price. I mean, support small or local businesses and artists, right?

My jaw dropped when I saw the $144 price tag. PLUS a $12 shipping charge. Yeah, I like them- but there was no way that I was going to shell out over $150 dollars for mugs. I knew I could DIY a version for a tiny tiny fraction of the price,and that's just what I did!


     I made a stop over to the trusty Dollar Tree and grabbed 4 mugs (for a dollar each, duh).

I already had my Porcelaine marker from my last mug-making project, so the cost was zero for that!

          I started out by drawing the same stick tree on all four mugs, and went to decorating season by season from there on out. Since fall is my favorite season- I started there. A few falling leaves and some straggler birds flying South for the winter later, I was done. Boom.
            Winter took about 30 seconds- just some dots of falling snow and a slim crescent moon.
          Spring turned out a little crowded with the budding leaves, bird in the nest, and passing clouds:
Summer finished strong with a tree full of leaves, a bright sun, and a flower hiding in the grass:
  Here they are all together!

As finessed as the Etsy collection? No.
$152 dollars cheaper than the Etsy collection? Yes.


Which season mug is your favorite?

Monday, January 16, 2012

Chevron art

   ** note: it's a good thing I wrote this post ahead of time. it wouldn't be nearly as peppy if I had written it after the game last night. sigh. heartbreak.**


   Alright folks, it's time to get on board with Tiffany at Living Savvy and her No Spend Challenge! Tiffany decided that for the month of January she wouldn't spend a dime on home decor-and is inviting all of you to do the same! Thus, when it came time to get some decoration in the downstairs bathroom I looked in the craft stash to see what I could make with what I had, rather than running to Michael's or Target!

I saw this chevron art and loved it. I mean, it's chevron. Who doesn't love chevron?

Originally from here
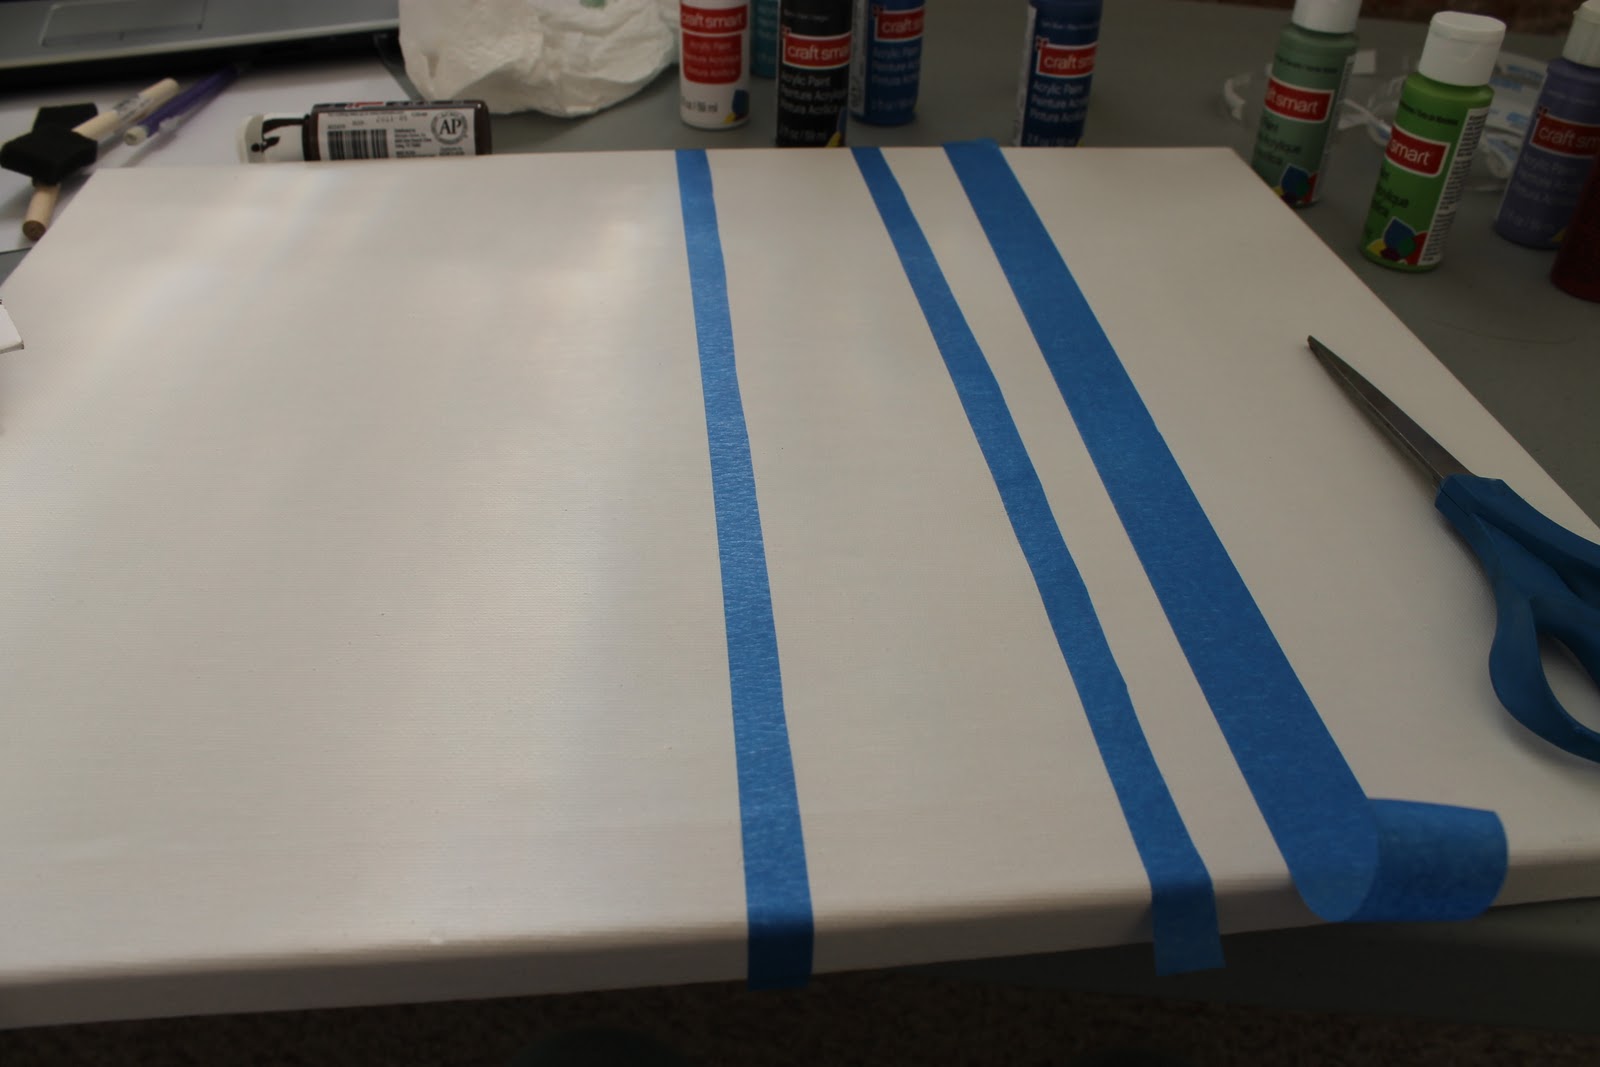
I have a lot of blank canvases from Michael's Crafts, so I grabbed one of those, some old bottles of acrylic paint, and the blue painters tape I got in my stocking from Michael's parents (do they know me or what!?). At first I was going to use the full width of the painters tape but realized it would be way too thick- so I just cut each piece in half:

 I started by making all the main vertical lines down the canvas, and slowly filled in the diagonal lines to make the chevron pattern:


 Cutting everything in half and taping it all in an even pattern took a while- but it sure looked cool!
 I started out with a lighter mint green to cover most of the background to make sure there wouldn't be any white space other than the lines once the tape came up:
 After that had a minute to dry I simply did random brushstrokes of different greens, teals, and blues.
 Ripping off the tape led to this:


 The upstairs bathroom had just gotten the Potato Polka Dot art recently, so the downstairs bathroom needed some color too! Before:
 After:


I love how well the white lines stand out- next time I think I'd make it a little more blended together rather than such obvious brushstrokes. Still, not bad for not spending a dime!

Like I said before, if you want to join the challenge, visit Tiffany over at Living Savvy and grab the button!


Living Savvy

I still have a healthy stock of canvases in the spare room ready for decorating- any ideas?

Thursday, January 12, 2012

Cranberry Orange Mini Muffins

It's muffin time. Cranberry Orange (and lemon) muffin time, to be more exact. I had some extra cranberries left over from making my Cranberry Lime Champagne Fizz cocktails from our holiday party, and decided to put them to good use. I saw these yummy looking cranberry orange muffins on Pinterest and decided I had to make them for our work meeting this week. They turned out perfect-you've gotta make these!

The recipe I used was adapted from one at Lick the Bowl Good- so if you want to go back to the original (that has nuts, and no lemon)- check it out there!

I used:
2 cups flour
1 cup sugar
2 1/2 Tbsp shortening
3/4 cup fresh squeezed orange juice (about 2 large oranges)
1 Tbsp orange zest 
1 tsp lemon zest
1 1/2 cups chopped fresh cranberries
1 1/2 tsp baking powder
1 tsp salt
1/2 tsp baking soda
1 egg
1/4 cup raw sugar (or demera sugar)

 Step 1: Preheat your oven to 350 degrees
 Step 2: Use either shortening or non-stick spray to coat your muffin tins
 Step 3: Mix together your flour, sugar, salt, baking powder and baking soda in a bowl and set aside.
 Step 4: Zest your oranges and lemon
 Step 5: Juice your oranges and add the juice to a bowl with the zest and the egg. Mix in to flour mixture until well combined.
Step 6: Chop your cranberries into small chunks and gently mix in to the batter.


Yes, it'll look like wayyy too many cranberries. it's not, I promise!
 Step 7:  Use a melon baller to dump even amounts of batter in your greased tins- about 2/3 full. Take your raw or demera sugar and sprinkle over the batter- in an even and full coating.
 Step 8: Bake for 12-15 minutes or until light golden brown.


 Step 9: Let cool completely in the tins, then pop them out and enjoy!

The sugar on top gives the muffins a nice little crunch and bit of sweetness to balance out the tart cranberries- totally delicious. They were a huge hit at the meeting as well as with Michael- they lasted about 2 hours! I highly recommend these muffins, they are deee-licious.

P.S. Demera sugar can be expensive to buy- I actually used packets of Sugar in the Raw! Whenever I get coffee to go I always grab a packet or two of the sugar then never end up mixing them in- so that part of the recipe was completely free!!


Monday, January 9, 2012

Potato Polka Dot Prints

   I've been terrible about remembering to post all the PIN-A-WEEKs I've been doing, so here's one! PLUS it's Make It Monday over at Brassy Apple!


Have you all heard of ohhappyday.com? No? Well make sure you make a stop over there today. There are so many decor blogs out there, but Jordan at Oh Happy Day! is truly creative and inspiring. I saw these sweet prints on Pinterest and had to make my own version:

     So adorable, right? You can see how she did them here. I decided our upstairs bathroom could use some fun polka dots, so I grabbed a $2 canvas from Michael's Crafts, an assortment of acrylic paint, and two small red potatoes. 
P.S. I kid you not, Michael was actually bummed when he came downstairs and saw me making this project. "You used my potatoes for CRAFTS?" Can you feel the disgust in that folks? Oh, and not because he thought it was gross to use food for art, just that he wanted to eat them and now couldn't since they'd be covered in paint. The boy likes to eat, what can I say?
 I cut the 2 potatoes in half, so there would be 4 potato stamps for different colors:
The easiest way I found to cut out the little circle is to use a pairing knife and cut a larger circle than you think you'll need. Cut small sections out around the circle so it'll be easier to remove the extra potato without slicing your finger open:


Once you have your large circle cut away, start trimming away a more perfect, smaller circle until you're left with this;

 A few potatoes later you'll be left with 4 lovely (and cheap) stamps!
 Next sit down with your canvas and select your paint colors. Since our upstairs bathroom has a white/tan/sage theme, I pulled out yellows, greens, browns, and white to make a variety of shades.
Measure out and mark where your dots will be:
 Dip your potato stamp in your first color- making sure not to have so much that it'll splatter out all over the canvas. (I may or may not have done that on my first try...)

 Start randomly stamping away, making sure to have both light and dark shades of each color!

 After a lot of mixing and stamping you'll be left with this:
 .....and this:

 Hang it up and enjoy- ours is hung in our (very yellowy-lit) bathroom!


Think you have some room for polka dot potato art in your house?
Related Posts Plugin for WordPress, Blogger...