Showing posts with label Apartment living. Show all posts

Wednesday, September 25, 2013

MAN, YOU'VE GOT STYLE.

We've actually started decorating our apartment.
 2 months in. 
We're doin' it, folks. Being adults and covering up the blank walls.

When we first moved in I had a collection of apartment pictures that I thought would fit in our place...but I've revamped that with what we really want, now that we've lived in our space for a bit!

Here's what's on our radar:

1. This recent lighting fixture from ABM is amazing. I love the look of the bare lightbulbs-- and while we might not go totally literal here with bulbs, there will definitely be some type of glass or chandelier in our lofted ceilings!
2. Light, bright bedroom with minimal art & simple monograms. Need I say more?
3. I am in LOVE with this green wood stain. I mean, so much more chic than just painting a dresser with solid paint. Our dresser needs a major makeover, and I'll be using this as inspiration for sure.
4. I have the most awesome 365 day calendar printed on my instagram photos from Social Print Studios, and while it won't be an entire wall of wallpaper photos, I think 365 will make a pretty good impact!
5. My gallery wall in our last place wasn't too much of a success, so this time around mismatching frames more is my goal. 

What's something you really love about your space?
For more of my favorites, go here!

xo, lp

Tuesday, September 17, 2013

EVERYTHING IN YOUR HOME SHOULD BE MADE OF ACRYLIC.

Okay mayyyybe an exaggeration. But I mean, plastic is BACK people. 
Yes, it's just plastic.

I mean, some stores try to pretend it's fancy and call it lucite- and charge a ridiculous amount for it...but it's really just plastic. No matter what you call it, it makes for some fun accessories, right?
The Container Store has an awesome selection of fun acrylic pieces, and at super fair prices. I already have the bracelet stand, and am going to be adding a few more of these pieces to my collection soon:
1. We just got a new desk in the apartment and I love this general organizer. Perfect for pens, stamps, or any random knick-knacks that need a home.
2. I REALLY need to get some business cards for this here blog...mainly so I can justify buying this card holder!
3.  Scotch tape has never looked so chic! This tape dispenser is $10 and worth every penny.
4. This tray is SUCH an awesome hostess gift, right? Or just a "I moved into a new apartment so this is my housewarming gift to myself" gift. 
5. These racks are excellent for organizing your necklaces and bracelets. Plus it makes for a pretty display!
6. This organizer is perfection for the lipstick lover. All the individual sections keep your collection from turning into a total mess!
7. I mean, if you have to have Qtips out, you might as well have a cute case to put them in...
8. Same goes for your make up brushes, or mascara/eyeliner- might as well keep it tidy in this slender case!
9. The catchall tray is necessary. Toss your jewelry off at the end of the day into it, or have it at the ready for keys and stray bobby pins. What's best is they stack, so for $6 a piece you can have some seriously good looking and affordable storage!

Which of these acrylic pieces would you use to organize your space?
I'm loving them all, but that tray is #1 on my list!

xo, lp

Wednesday, July 24, 2013

NEW PLACE, NEW SPACE

Here's the thing about our old apartment:
We knew it was very temporary. 

We had moved back to Madison in a hurry and started new jobs quickly, so we snatched up the first place available, that happened to be well below budget. It was enough space and was incredibly convenient for work & such, but overall we knew it never would be "home".

From our mangy-cat owning, cigarette smoking neighbor, to the constant screams of kids left unattended, to the parents swearing at their little ones, to the gigantic dogs that no one seemed to have leashes for... we soon realized we'd be out as soon as we could.

So where is the inspiration or motivation to decorate a place like that? 
There isn't.

Our new place is amazing. High ceilings, lots of space. We plan to be here and enjoy this place from the moment we move in, so I'm wasting no time putting together inspiring pictures of spaces that I'd want to live in. I really feel like the effort I put in to creating a perfect space will be appreciated here, and I can't wait to get started!

Here are some current favorites:
1. I'll actually have an office-y desk space in this place, and I love the use of IKEA cork circles in place of a large board. (image via)

2. We had a gallery wall at the old place but it wasn't overly inspiring. This time I plan to curate more carefully and add much more color! (image via)

3. Ohhhh a girl can dream that this $1,200 dresser would be hers. Le sigh.  (image via)

4. This DIY stump table is fantastic! So is the couch. (image via)

5. Will someone please give me some globes?! We have one. Consider the collection starting! (image via)

6. That pattern rug! That simple colorful art! That pop yellow lamp! All of it! (image via)

7. Oh, map wall. Someday I'll have you in my space. I'll save my pennies for you. For now, some other cool map art will have to do! (image via

Do you have a "home" Pinterest board? 
Share a link in the comments so I can scope out your style!

xo, lp

Wednesday, December 5, 2012

CHANGEABLE PANTONE ART

I promise this is the last post in which I'll talk about Pantone for a while. 
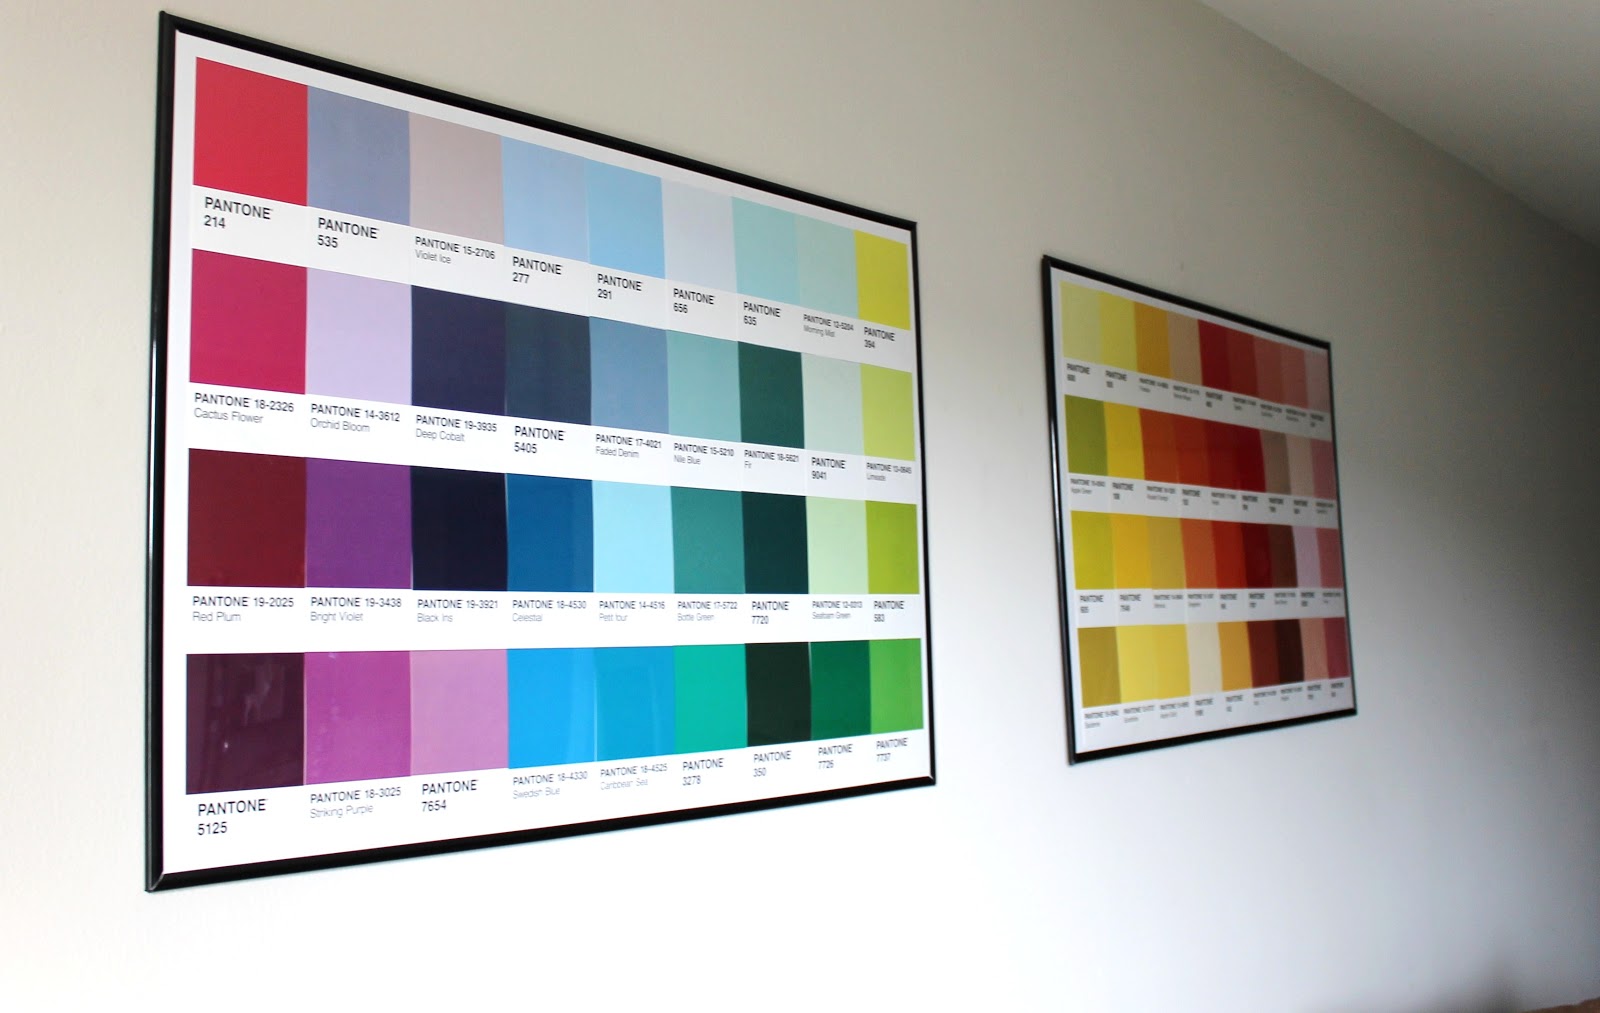
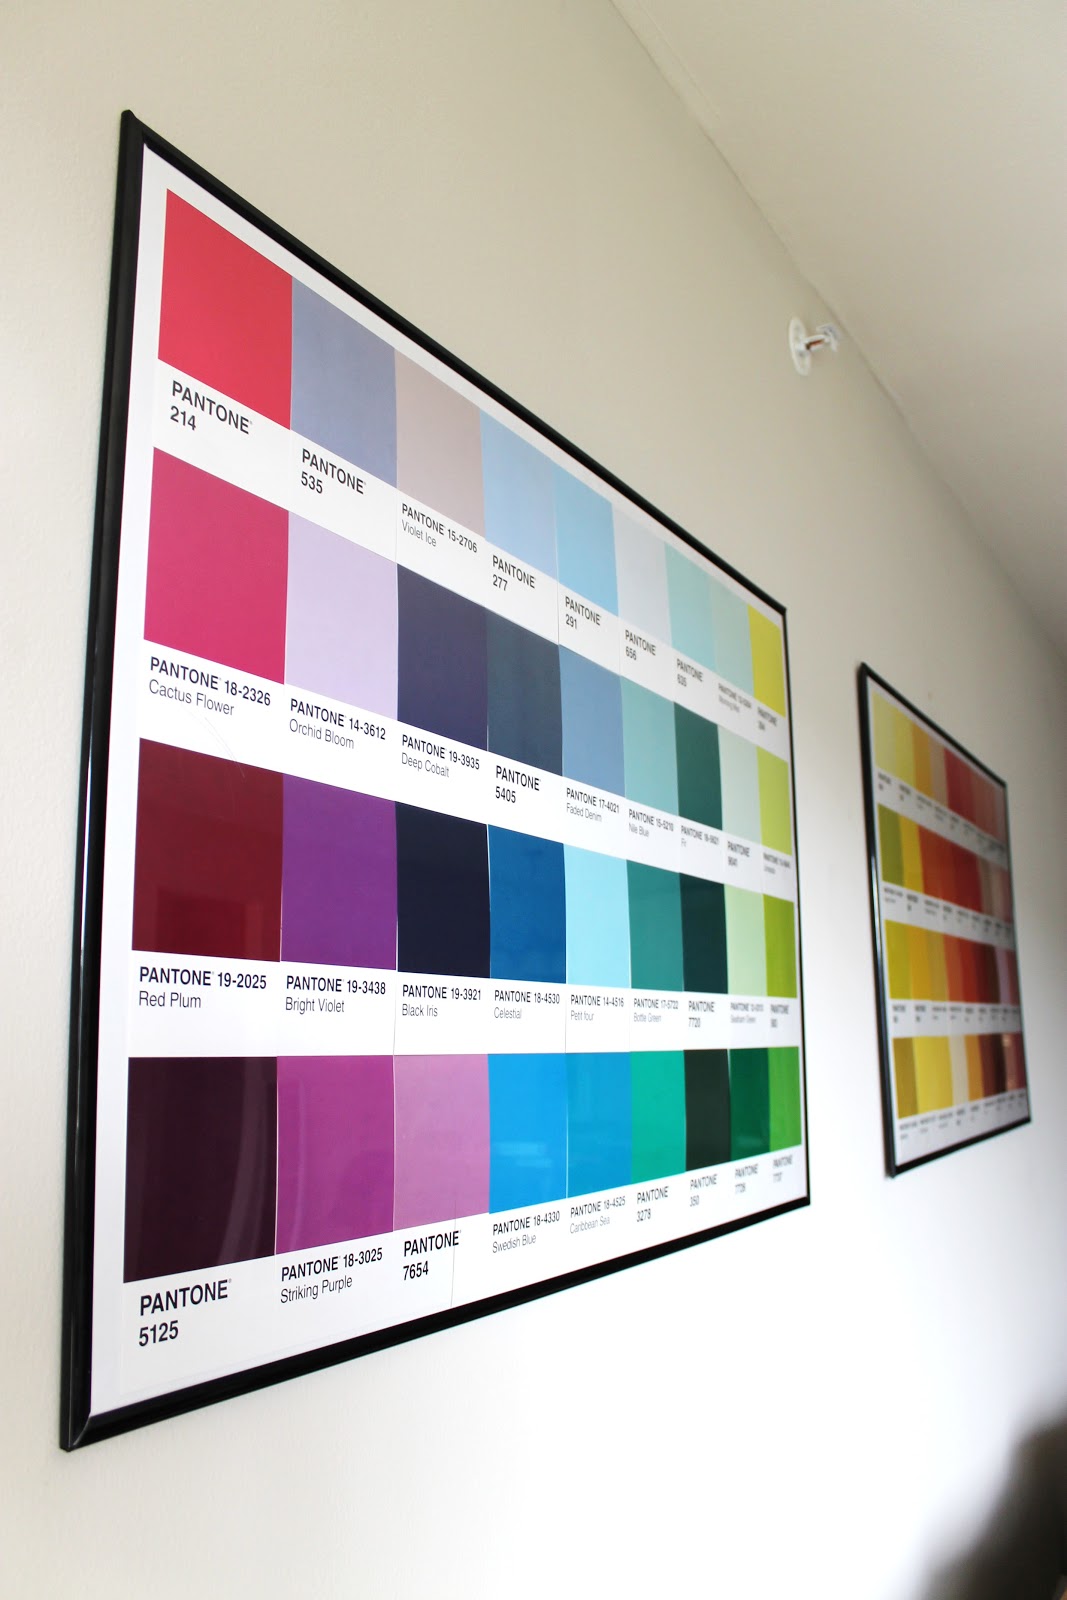
Last week I shared a bunch of colorful Pantone gifts for the holidays, and I figured it was time to show you all what I did with one of mine! My sister Louisa gave me an early Hanukkah present, and since that dear sister of mine knows me so well, she gifted me this set of 100 Pantone postcards. They were just so pretty that I couldn't bring myself to send them out...at least not yet.

Rather than keep them cooped up in a box, I decided to get them up on the walls. 
I bought a few 24" x 36" frames at Target a few weeks ago, figuring they'd be perfect for changing out art above our couch throughout the year- and sure enough they are!
Here are the awesome Pantone cards- even the box is cool! 
 Since there clearly isn't a method to this, I just started laying out like colors near each other, and secured them with the tiniest square of double sided tape- so when I wanted them to send out, I wouldn't damage them!

Since this isn't anything difficult, I'll cut right to the chase and show you how they look now:


 Pretty right? I kind of love them a little bit too much. Our couch is a grey-brown, so it brings a much needed pop of color to the living room! 

Have any fun, changeable art in your home?
Pass ideas my way please...just in case I actually decide to send out these pretty cards!

xo, lp

Pssst: In case you think you'd like some Pantone postcards/art in your home, or want to gift them for the holidays, you can find them HERE (usually $20, on sale for $15)!

Thursday, August 2, 2012

BOOK IT

These bookends rock.


Especially when you consider the fact they started out looking like this: 

I found these babies at a thrift store in Richmond, and with a $2 price tag, there was no way I was leaving them behind. 
I know some people are too cool for thrift stores, but really- it's all about going into it with an open mind. I always imagine everything in there with a fresh coat of white paint, and suddenly it all seems better. The best part about thrifting items is that you can change the look of them as many times as you want and don't need to feel bad about ruining an expensive piece! (I'm looking at you, $78 Pottery Barn Bookends)

So what did I do?
Sanded 'em
Painted 'em white (acrylic paint)
Painted 'em green. (spray paint)

Rocket science here, people.
 Look what I was left with! Pretty green guys that add a nice little pop of color to the room!
 Total cost of this project: $4.50
I can get down with that.

Have you ever scored any great thrift store/garage sale finds?
If you've made them over & shared on your blog, leave the link below!

xo, lp


-----------------------------------------
For those of you wondering, these are a few of my favorite books (and one of Michael's):
* East of Eden:: John  Steinbeck (Classic.)
* The Passion:: Jeanette Winterston (Not to be confused with The Passion Of the Christ. TOTALLY different.)
* Team of Rivals :: Doris Kearns Goodwin (this is one of M's. Abe Lincoln loving nerd)
* Shantaram :: Gregory David Roberts (Long, but worth it.)


Thursday, April 12, 2012

DIY Abstract Art How-to

*pssst! hey! so glad you stopped by B&B today! to find out more or for more colorful inspiration, be sure to stop by Instagram and say hi! --->@lpodlich*

*For a free month of ROCKSBOX just go HERE and use code "laurabff462" !* 
-----

I love to paint.
Am I good at it? No. At least not at painting objects in such a way that you can actually tell what I am painting.
Lately I've been trying to make some abstract art for the apartment, and let me tell you- it isn't easy.

I know, I know- I've been that person at the museum too who looks at a canvas with a big square on it and said "REALLY!? A four year old could do that!" I know, I'm a jerk. Don't act like you've never done it. Or maybe you haven't, because you're a better person than I am. Well, allow me to insert my foot into my mouth, because after many attempts- I've found abstract art is actually kind of difficult. After trying a few techniques, I finally settled on a triptych I like for the dining room. 

Here's how I made it happen:
easy art tutorial
Step 1: To create a base for the painting I just randomly swirled some white and mint green paint on the canvases, and made light, sweeping motions to cover the canvas without fully blending the colors. 
easy art tutorial

easy art tutorial

Step 2: I started with the mint green again and laid out a sloppy vertical line down the canvas. I made light sweeping motions with a foam paintbrush left, right, left, right to leave a pattern vertically down the canvas.
easy art tutorial

easy art tutorial
 Step 3: I simply repeated step 2 with a turquoise, and then a navy blue, each time moving a little to the right of the previous design, allowing for a slight overlap:
easy art tutorial

easy art tutorial

easy art tutorial

easy art tutorial
 Step 4: Then I began layering the colors once again, starting with white, mint, turquoise, and navy. It's important to give each color a few seconds to dry between coats so the paint is still wet enough to blend a little, but not fully mix to become one solid color.

easy art tutorial

 And after a few variations of the paintings I was left with these babies:
easy art tutorial
 Not currently perfectly centered and straight- but you all know I am wayyy to impatient to make that perfect before snapping pictures. Maybe someday when I'm an oh-so-famous blogger (coughsarcasmcough) I'll make the perfection happen. Until then, here's what we've got!
easy art tutorial

easy art tutorial

Will YOU be attempting some abstract art this week? If you have any other tips, please share!
xo,lp


PSST!

Do you LOVE Instagram? I'm always sharing a little bit more on my Instagram feed-- 
find me here --> @lpodlich!
**

Tuesday, March 13, 2012

St. Patty's Garland

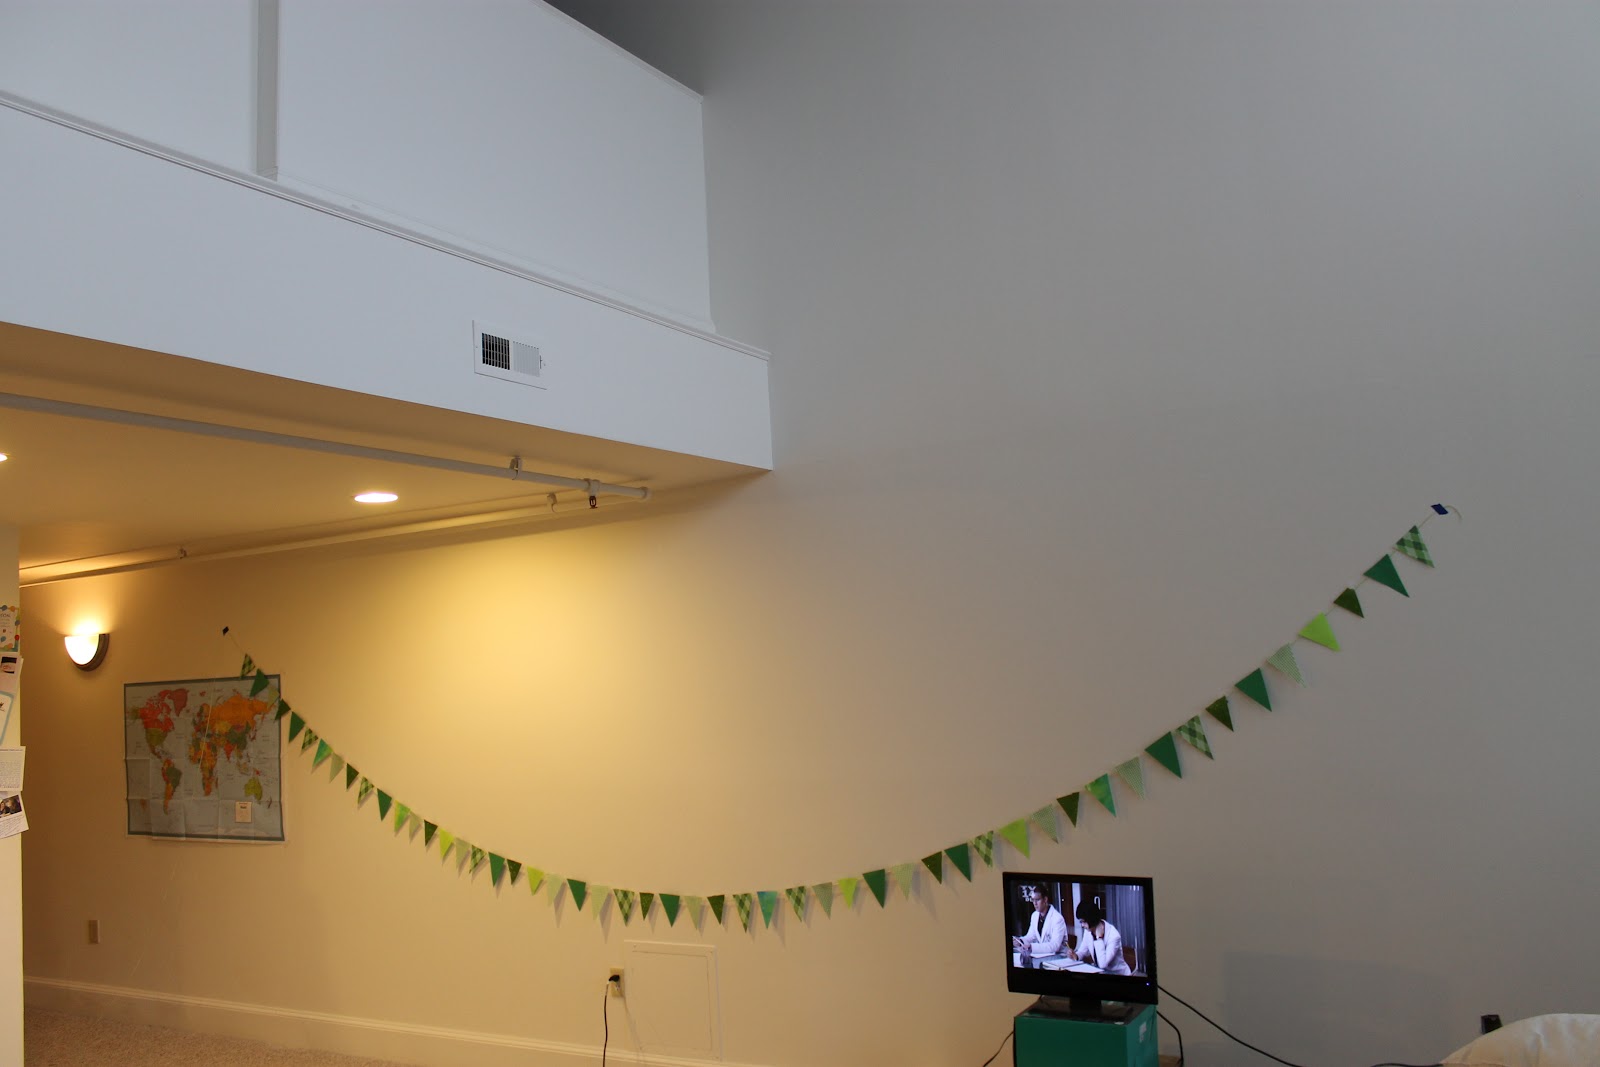
     As you saw yesterday with my Rainbow Cupcakes, I'll decorate/bake for any holiday there is. St. Patty's day is no exception- even though I'm 0% Irish. Since removing our Snowflake Garland from the holidays, our windows have been pretty bare- my half ass attempt at a Heart Garland for V-day was just not sufficient. Thus, my friends, the green St. Patty's Day Garland was born.

     I started by cutting up a few sheets of patterned green scrapbook paper into triangles...
....and grabbed some green ribbon (that I snagged at Michael's Crafts for 20 cents, btw).
Now, as you all know, I'm a ridiculously impatient crafter. A smart, patient person would have neatly set the ribbon out, and carefully taped the triangles in a row. Weeeelllll....I just started taping and taping and the next thing I knew, this is what I had:
Ah, yes.  A lovely knot of ribbon, tape, and paper. Just a typical night at our apartment. Smooth.
After finally detangling the giant mess I had created, I first hung the garland on our huge living room wall to make sure the triangles were spaced out fairly evenly.
Oooh, y'all get to see down the hallway to our front door. Exciting, right!?
This this is HUGE. That and the fact how tiny our current TV is makes it look even bigger...
After getting the final stamp of approval from Michael I hung it up:


It may not be uber sophisticated, but it's pretty and green and perfect for the holiday!

 Bonus: green is a spring color so I can leave it up at least through April, right....right?!
DIY under $5

Monday, February 27, 2012

Perfect Potato Leek Soup

 Today my loves, I'll share with you the recipe for this:


 It's Potato Leek Soup, and it's freaking delicious. Before I begin I have to say that while I'm blogging about it- I had nothing to do with the making of it. Each time it's been made in this apartment- Michael has been the chef - I just sit back and enjoy. I got him a crockpot as one of his Christmas gifts (yeah, we're sexy like that) and so far, the only recipe we've tried in it is this one. MULTIPLE times.

The original recipe (here) is from Pinch My Salt and was shared by my lovely sister Louisa. We altered it a good amount to suit our tastes, but it sure turned out delicious. If you don't have a crockpot, make sure to look at the originial  for instructions on how to make it happen.
For Michael's version you'll need:
2 Tbsp Butter
3 Leeks, thinly sliced
2 cloves of garlic, minced
1 Medium onion, diced
8 red potatoes, cut in either large circles or small chunks
2 cans 14.5 oz  vegetable broth
1/2 cup heavy cream
salt and pepper to taste

Step 1: Melt that butta, baby. Such a small amount would make Paula Deen cry.


Step 2: Sautee up your leeks, onions, and garlic for a few minutes until fragrant and limp.


 Step 3: Toss your leek/onion/garlic mixture into your crockpot, and then add your veggie broth.
Step 4: Add your potatoes with a pinch of salt and pepper, cover, and turn your crockpot on high. 

 Step 5: Let your soup cook for 3-4 hours, take off the lid, and make your apartment/house smell like heaven
Step 6: Use a potato masher to crush your potatoes. This shouldn't be hard, since they've been cooking for a few hours. Add your cream and put the cover back on. Let it simmer with the cream for 15 minutes, and enjoy!


This soup will not last long, I promise. It's creamy and hearty and ridiculously comforting. It's amazingly rich and filling- but not so much that you can't eat a whole bowl! It's not cold here in Richmond, but if it's chilly wherever you are, I can promise it will warm you to the core. It's THAT good.

 Oh, and here's proof that Michael really is the one making this soup: My hands are not big and hairy like that. 


So, will you be trying this comforting soup for a cozy night in? Have any good crockpot/soup recipes for us to try out?
Related Posts Plugin for WordPress, Blogger...